Search This Blog

Showing posts with label kids. Show all posts

Sunday, June 5, 2016

Natural Sunscreen put to the test....Part 1


We are going to the waterpark capital in the world in the Dells in Wisconsin for a fun family vacation this week.  So, I thought what better time to try out a homemade sunscreen recipe?  

Here is the one I used from "Wellness Mama":

http://wellnessmama.com/2558/homemade-sunscreen/

The only changes I made were I lessened the beeswax and Shea butter by half hoping to keep it more liquid than lotion, because I put it in these cool roller ball oil holders so the kids could easily apply it to their faces.  I also added pomegranate oil after researching natural sunscreen ingredients.  

We are going away for 3 sunfilled days.  I am going with another family and taking extra kiddos so we have a combined 11 children to use as guinea pigs!!!!  

So far she loves the smell and getting to apply it herself!!!!!  I love that it has NO harsh chemicals.  I will report back after the trip....... 😎

1/16/17 

UPDATE!!!!  (Sorry, I forgot to come back and update!)  The sunscreen worked fantastic.  I used it this trip and all summer long.  My husband and even went with another couple to Punta Cana and I took it with me.  I didn't have to buy anything!  The only day I burned, (and I was out all summer long) was the last day of our trip.  We left in the morning and went on an island tour that lasted the entire day and we had almost no shade.   If it wasn't for that day, I would've made it the whole summer without a single sunburn. So I would say it was a very successful batch. 

Tuesday, July 22, 2014

Vacation Travel made Fun!

I really do believe that getting there is half the journey, but I honestly felt ill when I map quested our destination and saw I will be in the car for 17 + hours with my little blessings later this month!  It has been a while since our last long driving vacation and the twins now being 3.5 should make it interesting!  We have been preparing mentally to hear 5 million times, "are we there yet?"  I've also been putting our traditional activity boxes together.  They get so excited as each ziplock bag full of goodies is packed away.  I find myself stopping obsessively at dollar stores and thrift shops looking for toys and games that will keep them entertained in between potty breaks.  Here are a few things we have gathered so far:


This is what the boxes look like put together.  There is one for the 3 yr olds and one for the 6-10 year olds.  My rule is you must put everything back into it's correct bag before a new activity can be checked out of the box.


This is why you must put your bags together before you leave, otherwise you will have all this trash and wrapping on your vehicle floor.


I found these boxes at Kmart.  They were $4.99 each, the perfect size and with the lid on they will double as a lap desk or game table!


Some packing tips:

Don't forget to bring glow sticks and bracelets!  My kids build some cool stuff with them once the sun goes down!!!  Flash lights and light up toys are very exciting at night when your almost there!

Remember to put everything you will need per activity into each ziplock bag.  (Like Qtips for paint with water, or scissors for crafts.). It would be a bummer to not have what you need on the road.

Check around your house and in the bottom of your toyboxes.  You'll be surprised at what you find that would be exciting if you were stuck in your seat.

Let your kids help pick items out.  It helps build excitement, but also plan a few surprises they don't know about.


The concept is really simple, the hard part is waiting to leave.  Doesn't he look pitiful! He will be thrilled when he gets to open his box in a few days.  It will feel just like Christmas!

Use your imagination and prepare to enjoy the travel days to your vacation destination instead of losing them to grumpiness and fussy bored kids!

Saturday, June 7, 2014

Gluten Free -Sugar Free AND Yummy Pancakes

It's been a while since I posted, but that doesn't mean I have been doing things naturally or homemade.  It has been between 1-2 yrs since I started eating low carb and no sugar.  I feel so much better and now when I have, oh maybe a donut or something like that, I feel nauseous within minutes.  I've lost 25 lbs and most importantly, kept it off.  I haven't shared what I've been eating regularly, so I'm going to try to post my favorites in hopes that you can see it is possible.  I've read many books on the subject and have called my diet "The God Diet". Eat foods the way God created them, minimally processed and as whole as possible.  I buy almost exclusively organic and have learned how to feed my family on a budget and remove the dreaded cereal addiction from my pantry.  We are not perfect, we cheat, we eat out, we are REAL :)

Here is my family's favorite breakfast, which I make in 5 minutes and bake for 20. (If you want to flip pancakes for 2 hours you may cook them in a griddle). It will last us 3-4 mornings and the kids beg me for it.  Enjoy, and feel free to downsize the recipe (or increase :) to fit your needs.  This recipe makes about 62 small pancakes.

Gluten free -Sugar free Pancakes

4 cups rolled oats 
1 Tbsp baking powder
1/2 tsp sea salt
2 Tbsp Stevia/Truvia or sweetener of your choice
1/2 tsp cinnamon

•pulverize it together in blender

•add 1 tsp vanilla, large container of egg whites, large container cottage cheese, 1 Tbsp coconut oil, blend well. 


•here's where you choose, oven baked or pan fried.  If you're using the stove top, make like normal pancakes.  If your baking in the oven, preheat it to 350 degrees and bake for 15 minutes per pan or until done in the middle.  This batch makes 3 pans 1/3 full.  I've found it is the perfect thickness. ( Any fuller and the pancakes are doughey in the middle.) be sure to spay your pans with nonstick spray, I use coconut.


•remove from oven and let cool.  Cut into bars.  


•serve with fruit, whipped cream, maple syrup, etc.

Store leftovers in plastic zipper bag in fridge for the next breakfast.  Hide from the kids or you'll be making them again tomorrow 😍


Here is a pan fried batch:

Sunday, March 9, 2014

Hidden zucchini, lasagna ;)

My kids hate zucchini, so they say.  I made a regular lasagna last night for the kids and a veggie-noodless one for me and they just raved about how great their's was.  What no one (except you) knows is that I peeled and shredded 2 whole zucchinis and mixed it into their ricotta cheese layer.  I've tried that in the past and they complained instantly that there was some weird green things in their lasagna.  But not this time!  This time they went back for seconds and my oldest son, also the pickiest, had thirds.  So, don't give up mamas.  You know you can outsmart them and get some veggies in even the pickiest eaters, just don't give up!

This is the peeled and shredded zucchini.  When I mixed it with the ricotta cheese, eggs and spices it looked just like shredded mozzarella :)-

Thursday, January 9, 2014

Beating the winter blues...

We have some pretty stir crazy kids around here.  It's been negative and single digit temps for several weeks.  If I go to the store, it's usually alone, so the kids are really really bored!  Today I saw an idea on my newsfeed and decided to try it.  We have done something similar in the past in a cookie sheet and I will say that on the window has kept their attention much longer.  Have fun exploring your kitchen and inspiring your kids too!

We used any thick liquid I could find (I.e., dish soap, tempura paint, mayo, yogurt, ketchup, mustard, choc syrup, etc.).  I recommend double bagging them in gallon freezer bags for durability.  We added glitter to the dish soap one.  The top left one is mayo with a few drops of food coloring.  Tape the bag closed and tape to a window or wall with packing tape.  When you're done, take down and toss!  

I'd love for you to comment with your ideas.  This was really fun!!!


Monday, October 28, 2013

All Natural Applesauce


We were at Royal Oaks Apple Orchard recently and bought a bushel of windfall apples.  Today, I finally had a morning to turn them into applesauce.  The kids quickly took the slicing and dicing over and I did the dishes.  I forgot how easy....and delicious this is!


We sliced 30-35 apples with an apple slicer, we also left the skins on.  Then, we chopped them into chunks with a chopper.


Add them to a large pot with 2-3 cups of water, 1/4 cup apple cider vinegar and 1/2 cup brown sugar.  


Cook on med-low heat until tender.  Add 2-3 Tbsp. of cinnamon.  Put in small batches through a food processor.  Pour into your sterilized jars and top with lids.


Our first jar didn't make it to the pantry, but was eaten by some sneaky monkeys ;)


I add 2 cups of blueberries to the last bit for blueberry-applesauce.  It was so good :)


This batch made 11 pints of homemade applesauce.  

Wednesday, May 15, 2013

Homemade Pizza

As most of my readers know, I am the mom of seven amazing children.  I will admit that I haven't always been the naturally homemade mom you see today.   16 1/2 years ago I was a macaroni and cheese and chicken nugget kind of mom!  I'm not saying that's horrible,  I'm just saying deep down I always wanted to feed my kids healthy foods without being dependent on the box aisle or freezer section at the grocery store.  Add six more children and a decade (plus) of experience and I have slowly become the kind of 'from scratch mama' I hoped to become!  Tonight I was making homemade pizza with the kids and I overheard my five-year-old ask my seven-year-old why we couldn't just order pizza.  He told her that everything homemade is always better than anything store bought.  I did a little jig in my brain :). 

As soon as they noticed I was kneading dough, the twins came over to the kitchen island yelling "zi-za!!!!" After making two homemade pizzas I had the third lump of dough left, so I let the 2 year old twins make their own pizza.  They beat the heck out of that dough...it was as flat as it could get!  There was flour all over the kitchen, sauce all over the counter, and smiles everywhere I could see. 

" Yes," I thought, "this is the kind of mom I want to be."Enjoy!


Homemade pizza dough (makes 4 large so half it if you don't need to feed an army!) 

6 cups warm water
1 stick butter,melted
2 tbsp yeast

1/2 tsp salt
10-12 cups flour
2 tsp olive oil

Melt butter and add warm water into a bowl.  Sprinkle in yeast and stir.  Let sit until dissolved and bubbly, about 5 minutes.  Dump in the salt, add flour several cups at a time, stir well.  When the dough is starting to stick together dump a cup of the flour onto a clean counter or surface.  Knead the dough into a smooth ball adding flour a Tbsp at a time if too sticky.  Split into 4 equal sized lumps.  Let rest 10 minutes.  

Preheat oven to 425 degrees.  Put each lump of dough onto pizza pan and press flat with your hands (or let your kids go to town :)  Top with pizza sauce, your favorite toppings and cheese.  Bake for 15-20 minutes.  

Now, before you discount this blog as too much work and 'that family is so perfect'.....I'm adding this final picture of my son who got into the lipstick in my purse while I was blogging this post.  Yeah, I'm that kind of mom :)


Wednesday, March 20, 2013

Toddler snacks: Peanut Butter Rice Crispies

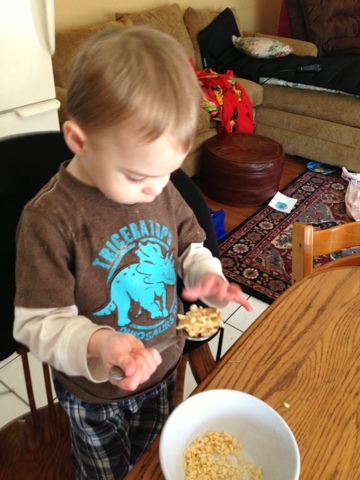
I'm always looking for simple and healthy ways to get the kids to eat better. We have 2 year old twins that are in the 'I can do it myself' phase. Cereal is so messy, so far I've come up with 2 fun ways to eat it that get more in their mouth and less on the floor.

I take a small spoonful of natural peanut butter or 1/4 of a banana and give them a few spoonfuls of Rice Crispies at a time and let them dip into the cereal bowl. The cereal sticks to the spoon of peanut butter or banana and they love getting to do it their self! What ideas have you found that work with independent eaters?


Thursday, October 18, 2012

Homemade Honey Lemon and Orange Cough Syrup

A few summers ago I was on vacation with the family. The morning after a miserable night in the hotel with coughing kids, I was up and into an Urgent Care. The doctor on call asked me if I had heard of the benefits of natural honey for coughs? I hadn't but LOVE the natural approach to just about everything so was of course all ears! He gave me a packet of studies to read up on about the overwhelming evidences for natural honey being more effective than every single over the counter AND prescription cough medicine. I went to the nearest Farmer's Market and bought some honey. We were able to sleep that night and I have used honey for coughs ever since. This year I decided to up the attack on coughing and am trying an all natural cough syrup with raw honey as it's base. It takes about 10 minutes, quicker than I can get in and out of Walgreens, and makes 1.5 pints of syrup. The total cost here is about $9. Here is my recipe and how to do it.
 
Ingredients:
1 pt. of raw honey
1 orange
1 lemon
1/2 cup water
 
 
Slice the orange and lemon.  Boil in water for 5 minutes to soften the skin and release the pulp.  I mashed mine slightly with a plastic spoon.
 
 
Let the lemon and oranges sit in the water to cool slightly, about 5 minutes, then strain.
 
Pour liquid into clean and sterilized jars.
(My ratio is about 1/3 liquid to 2/3 honey, or 30% to 70%.  Most recipes recommend not exceeding 50% water to 50% honey)
 
 Mix well and store covered in the fridge for as long as you would normally keep honey around.  (For me it is 3-6 months, perfect for cold season)

For Adults use, 1Tbs; children 50 pounds and over, 1 tsp; and children under 50 pounds, ½ tsp. May be taken four times a day or as needed. 

You can also drink it in a cup of herbal tea as a nice way to soothe your throat and quiet your cough.

*This is recipe and blog is not intended to replace medical advice.  Always talk to your doctor and discuss medical treatment, including home remedies, before use.

Some noteworthy notes:

* *DO NOT use honey for children under two years of age - there is a microorganism in honey, which is otherwise harmless for children age two and older, that can sometimes make infants ill because of their young digestive system. Alternatives include brown rice syrup, barley, and organic fruit syrups; as substitutions in the recipes use the same amount as honey.

* DO USE all natural raw honey if at all possible.  It takes a little effort to find a good source, but is well worth your time.  Natural raw honey is full of wonderful antibacterial properties and has been used for thousands of years for it's health benefits.  Recent studies have shown the unusual antibacterial activity of honey, leading to a greater understanding of the ability of honey to kill pathogenic bacteria through several different mechanisms. In studies, honey was effective against many different drug resistant bacteria.

**DO NOT boil, microwave, or overheat your honey as it kills the good stuff in it and changes it's properties. (Think about it like you would the good bacterias in yogurt ;)

*DO Learn more about honey as a medicine.  There are many many resources out there and reliable studies to read on the use of natural honey.  Take the time to educate yourself so that you can make wise health choices for your family.

Learn more:

http://www.mayoclinic.com/health/honey/AN01799

http://www.washingtonpost.com/national/health-science/honey-eases-childrens-coughs-study-shows/2012/08/27/2ed5b478-6a22-11e1-acc6-32fefc7ccd67_story.html

http://www.cbsnews.com/video/watch/?id=7419158n

http://www.foxnews.com/health/2012/08/06/honey-may-ease-nighttime-coughing-in-kids/

Friday, June 8, 2012

mini chocolate croissants: freezer recipe

I have been enjoying the benefits of preparing great food in advance and storing it in the freezer.  It is called 'freezer cooking' and has been saving me valuable time and money, as well as being able to pull amazing things out and in a flash wowing my guests.  Recently, I tried a chocolate croissant recipe that was well worth the effort.  My kids called them an awesome dessert, but I just had to have a few with my morning coffee, making them breakfast!  This recipe makes 64 mini rolls, but only about 50 made it to the freezer.  This is one of those recipes that I don't mind the kids polishing off quickly so I can try it again ;)


Mini Chocolate Croissants
2 TBSP. Yeast
1.5 cups milk
3/4 cup butter
1 tsp. salt
3/4 cup sugar
3 eggs
7 cups flour
1/2 bag chocolate chips

Melt the butter in the milk in a saucepan.  When it is warm, not hot, pour it into the yeast and sugar.  Let set for 5 minutes.  Add eggs, mixing well.  Add salt and then the flour 2 cups at a time until well blended. (I use a Kitchen Aide mixer)   Divide the dough into 4 equal pieces.
Roll out one portion of the dough into a circle about 12" in diameter.

Here is where little hands can help (but be sure you have extra chips or you will run short).  Cut the circle of dough into  16 pieces like a pizza.  Add chocolate chips to each triangle and roll them up from the outside in, placing each crescent roll on a greased cookie sheet.  (Because these are mini sized I used 3 cookie sheets total.)

Set the cookie sheets in a warm place and let rise 2-5 hours or until doubled in size.  Bake at 350 degrees for 12 minutes or until golden brown.  Place on a cooling rack to cool and then sprinkle with powdered sugar.  After flash freezing them, I do it on the cooling rack, then put into a gallon sized plastic bag for storage in the freezer.  Take out of the freezer and let them defrost for 15 minutes before serving, or if you want you can heat them up for a few seconds in the microwave and serve warm.  I grabbed 3 on the way out the door this morning and ate them in the car with my latte...HEAVEN!!!!!

Thursday, May 31, 2012

Banana Bread French Toast Sticks - freezer meals

Ever heard the saying, "Necessity is the Mother of invention?"  Well for me, Necessity is the Mother of new recipe!"  I was making our new standard Pumpkin Pie French toast sticks for the freezer last week and I made a planning error:  DO NOT MAKE THEM WITH THE KIDS AROUND!!! Take it from me!  I could hardly keep ahead of them as I pulled them off the griddle.  I finally sent them all away and started on a second batch, but was out of pumpkin puree.  I improvised and think these are just as great, if not better, than the original recipe.  Here it is:


BANANA BREAD FRENCH TOAST STICKS
Ingredients:
2 bananas
1 can of carrots
12 eggs
1/2 cup milk of your choice
1/4 cup brown sugar
1/2 tsp. each of cinnamon, nutmeg, and vanilla
2 loaves of bread
powdered sugar (optional)

Mix in a blender the can of carrots (drained), milk, banana and 6 eggs.  Pour into a large bowl.  Blend up the rest of ingredients and add to the first mix.  (The reason I do it separately is because my blender wouldn't hold all of the batter so I divide it into two batches.)

Dip individual slices of bread into the batter and cook them on a griddle or frying pan, turning once for each side. 

***In  my previous post on Pumpkin Pie french toast sticks I was baking them in the oven.  I have found that if just do them normally in slices on a griddle it is faster and easier to clean up saving you more time and effort.  I can fit 6 slices on the griddle and take them off laying them directly to a cutting board where I cut them into sticks with a pizza cutter. 

Place the strips onto a baking rack to cool and sprinkle with powdered sugar.  (This is usually when they start disappearing one by one as the kids 'help' sprinkle powdered sugar on them). 

When my baking rack is full I place it in the freezer to flash freeze them (about 30 minutes).  Then you can store them in gallon freezer bags without them sticking together. 

Take out your desired amount of French Toast sticks and warm in the microwave, toaster or oven.

Friday, May 25, 2012

'Almost' Perfect Chocolate Waffles

We were driving home from a long day at the zoo and my mind started frantically trying to remember all the items in my freezer and pantry as we sat in Memorial Day weekend traffic.  I knew the frozen fruit smoothies and egg burritos we took to the park for lunch would soon wear off and I would have 7 hungry kidlets, probably just about the time we would pull into the driveway.   I was right.  I remembered my ace in my back pocket.......waffle mix.  The kids were starving and the only way I convinced them to put down the box of cereal and wait for me to make waffles was to add cocoa and promise whipped cream and chocolate syrup!  They were a fabulous and spontaneous creation, but were missing one ingredient...bananas on top would have made this recipe perfect!  Oh well, I guess I will just have to make them again!


Chocolate Waffles

4 cups baking mix
1/2 cup sugar
1/3 cup cocoa powder
2-3 cups water
1 cup of milk (your choice, I used Almond)
3 eggs
1tsp. vanilla
1 Tbsp. Vegetable Oil

Optional toppings: strawberries, chocolate syrup, bananas, nuts, choc chips, whipped cream, caramel, cherries, m & m's, peanut butter.....the list goes on and on!

Mix all of the ingredients in a large bowl, add liquid until batter is the right consistency. 
Pour into your waffle iron (this one is mine:) http://www.kohls.com/kohlsStore/kitchen/electrics/wafflemakers/PRD~275565/Bella+Rotating+Belgian+Waffle+Maker.jsp)
Cook until done (about 4 minutes) and then top with toppings. ENJOY!

Thursday, May 17, 2012

Tuesday is freezer meals day- French Toast sticks, smoothies, pizza pockets and egg sandwich patties!

Mondays are my 'catch up on the house' days, Tuesdays are my 'catch up on the freezer meals' days.  I have found that if I put some time preparing snacks and meals in advance I save time later.  This week I made 120 French toast sticks, 18 pizza pockets, 10 smoothie packs, 20 breakfast egg patties, and 14 carrot juice ice cube packs for smoothies.  Total in time it took 2 hours and has saved me tons of time later on in the week.  The best part is that the  kids (and my husband and I) have really good choices that take little time from freezer to table.


The Pumpkin Pie french toast sticks were yummy. (I made them while I was making dinner Sunday night.) I took 1 can pumpkin, 1 can of sweet potatoes and mashed them thoroughly. I split the mash into two bowls. The first bowl got my waffle mix added to it and as I made the waffles for dinner I worked on the french toast, too. Add 1 dozen eggs, 1/2 cup milk (I used almond), 1 tsp. vanilla and 1/2 cup brown sugar to the mash. Mix well. Stir in 1/2 tsp. of cinnamon and 1/2 tsp. of nutmeg. Take 1.5 loaves of bread (about 42 pieces) and split the slices into thirds. Take each strip and dip it in the batter then place it on a baking sheet. Bake at 375 for 15 minutes, flip and bake 3 more minutes on the other side. I flash froze the batches in the freezer on a baking rack and then combined them into a gallon size zipper bag. Reheat the sticks in the toaster oven or microwave.

Tuesday I made pizza pockets for the first time, they were fabulous. Here is the link to that recipe:
http://naturallyhomemade.blogspot.com/2012/05/pizza-pockets.html


Then I made smoothie packs from 3 cartons of strawberries, 1 bag frozen blueberries, and 1 bunch bananas.  (I juice 5 lbs. of carrots once a week and freeze them in 1 cup portions.  I also save leftover watermelon juice and freeze it the same way to add in our smoothies instead of ice.)  Here is my favorite Green Monster smoothie recipe: http://naturallyhomemade.blogspot.com/2012/05/green-monster-smoothies.html


Next, I decided to use up the rest of the diced veggies by making breakfast sandwich egg patties.  Just take 10 eggs mix well, add 2 cups of spinach (sauteed with chopped turkey bacon and onions, and cooled) and sprinkle the veggies and bacon into eggs.  Bake in a greased rectangular cake pan at 375 for 20 minutes.  Take out of oven and let cool.  Cut into squares and freeze in plastic bags in the freezer.  To eat, reheat the patty in the microwave and serve on a toasted English muffin with a slice of cheese....delicious!


When I was finished with the 'freezer' cooking the kids came in and showed me the toad they found in the sandbox....they were busy too!

Green Monster Smoothies

Okay, so the other day I was reading a blog and found a smoothie recipe for Green Monster smoothies.  I was VERY sceptical, but decided to give it a try.  The blogger promised me that my kids would suck down the mostly spinach and kale smoothies and beg for more.  I tried it and guess what?  She was right!  My kids literally beg me to make them and even our baby twins cry when the blender goes off and I start pouring cups.  I have to make 2 batches at a time so everyone will get their fair share and will even confess that when the kids were out in the sandbox the other day I snuck a whole one for myself!

So here is our version, I promise it just tastes like a banana smoothie!


Green Monster Smoothie~
4-5 cups fresh spinach
2 cups fresh kale leaves ( I pull them off the stem, the stem can be bitter)
1/2 cup orange juice
1/2 cup carrot juice
1 banana
ice cubes

Puree the greens in the juice.  (We juice a 5lb. bag of carrots once a week and have them frozen into 1 cup portions in the fridge.  You could leave it out, but I add it for an extra vitamin packed kick).  Be sure to blend the heck out of the greens, no one wants chunky spinach in their smoothie. Add banana and ice and mix until smooth.  Pour into glasses and ENJOY!